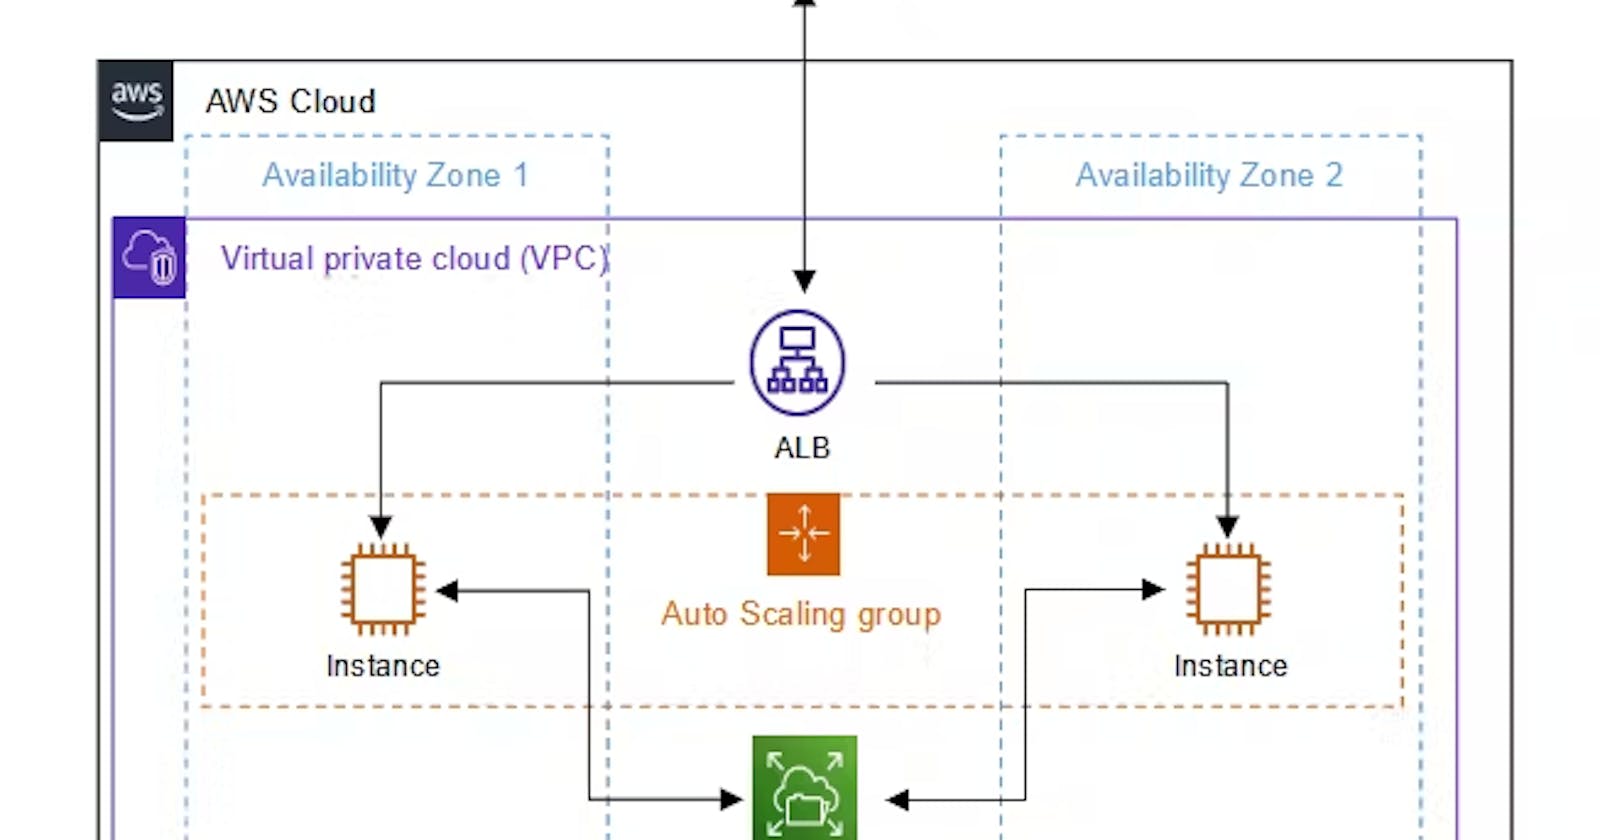


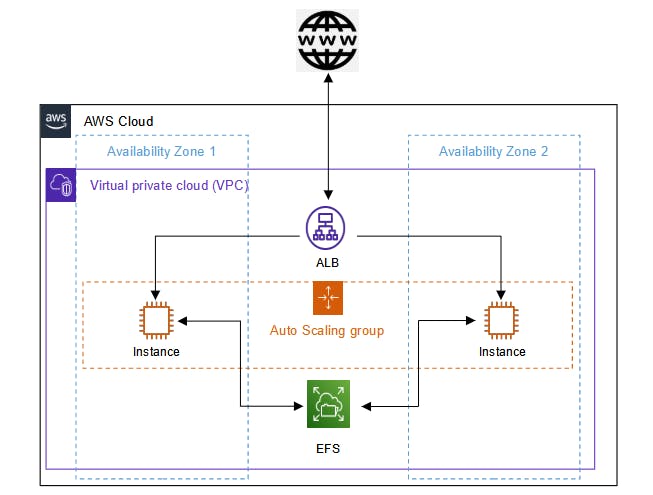
Architecture:
To Obtain the above specified HA Jenkins with EFS, We need to go with following steps:
Create JENKINS_AMI for Auto-scaling group
Create the Jenkins servers Launch Configuration
Create an Auto-Scaling Group
Attach a LoadBalancer to ASG
1.Create a JENKINS_AMI for Auto-scaling group:
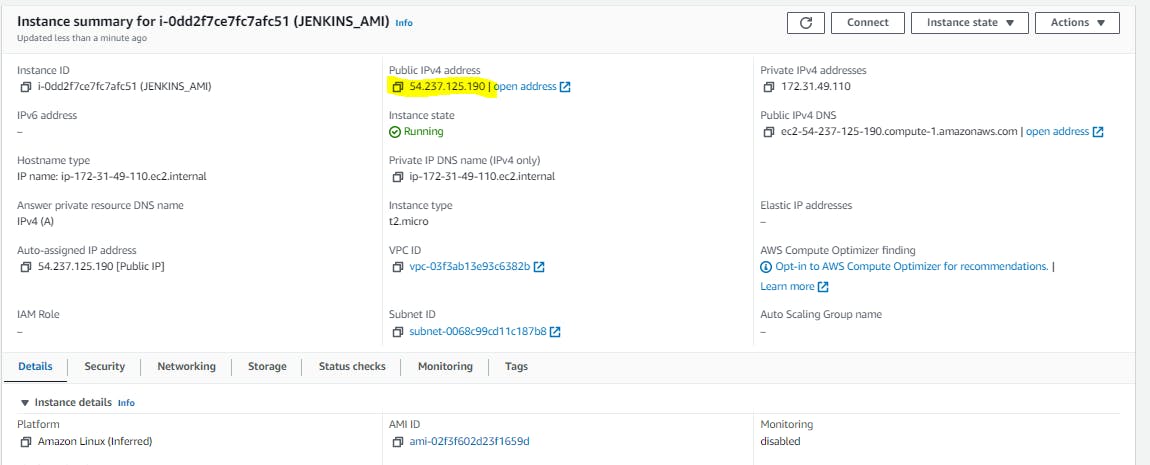
1. Login into AWS account and Launch an EC2 instance with the following details:
Name: JENKINS_AMI (You can give any thing)
OS_Type: Amazon Linux
instance_Type: t2.micro
Create a key-pair to login from your local system:
- Click on Create new pair hyperlink in the EC2 Launch page.
- Give name and leave other options as default and click on create key pair button.

- Key-pair will download to our local.
- Select the key-pair that you have created in the previous step.
2. In the Network settings, Select your VPC. I am using the default VPC.
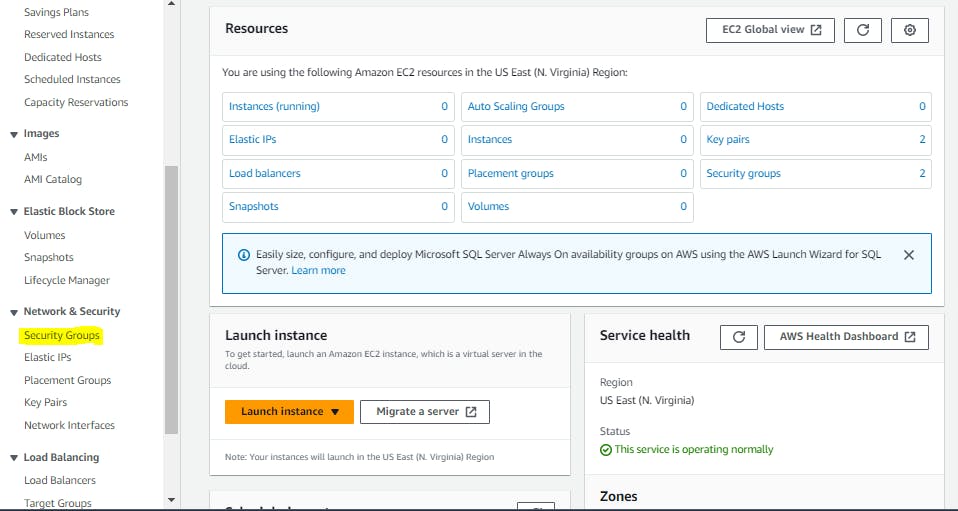
3. Lets create a security group:
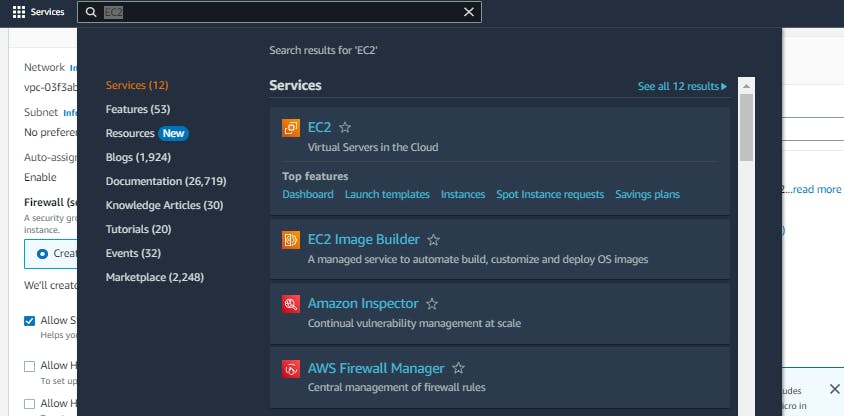
- Search for EC2 service on search bar, and Open it in a new tab as shown below:
- Click on create a security group
- Add security group name and give description
- click on add rule below in inbound rules and add rules as shown below:
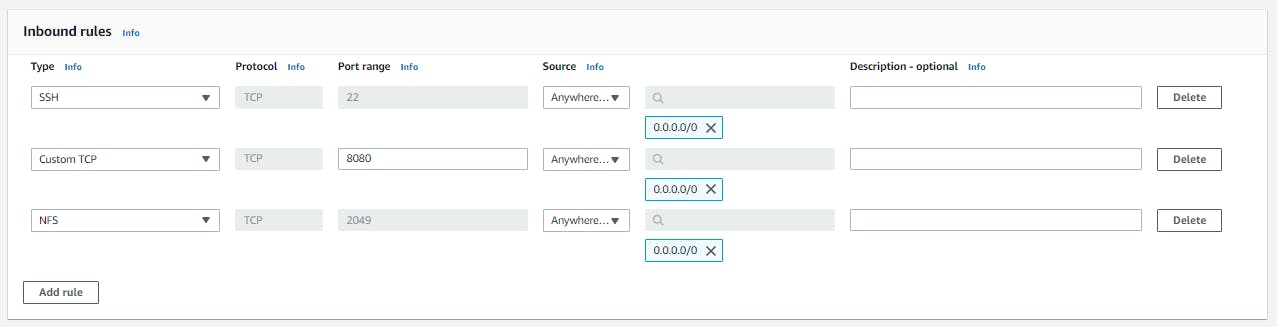
- Port 22 is to connect ec2 instance from our local machine and Port 8080 exposes our jenkins and Port 2049 is for EFS mount. You can fine tune source IP's, If you want. I have allowed anywhere.
- Come back to previous tab and select the existing secuirty groups and click on refresh button.
- Select the security group that you have created.
- Leave all the remaining options as default and click on Launch instane.
4. Lets create a EFS for our jenkins instances. Meanwhile, the jenkins instance will get started.
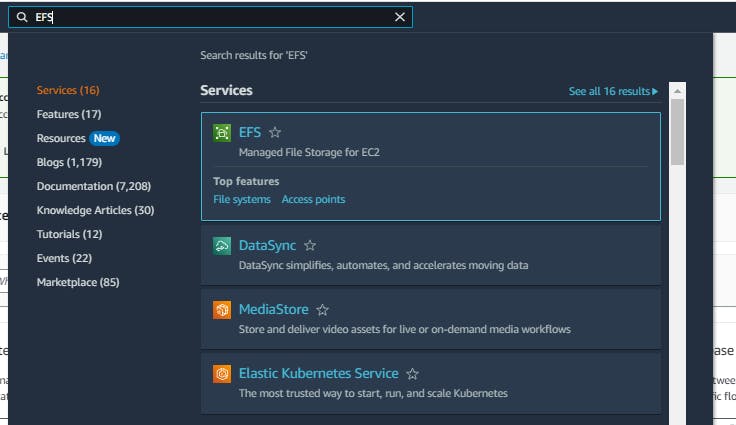
- Search EFS on search bar and click on it as shown below:
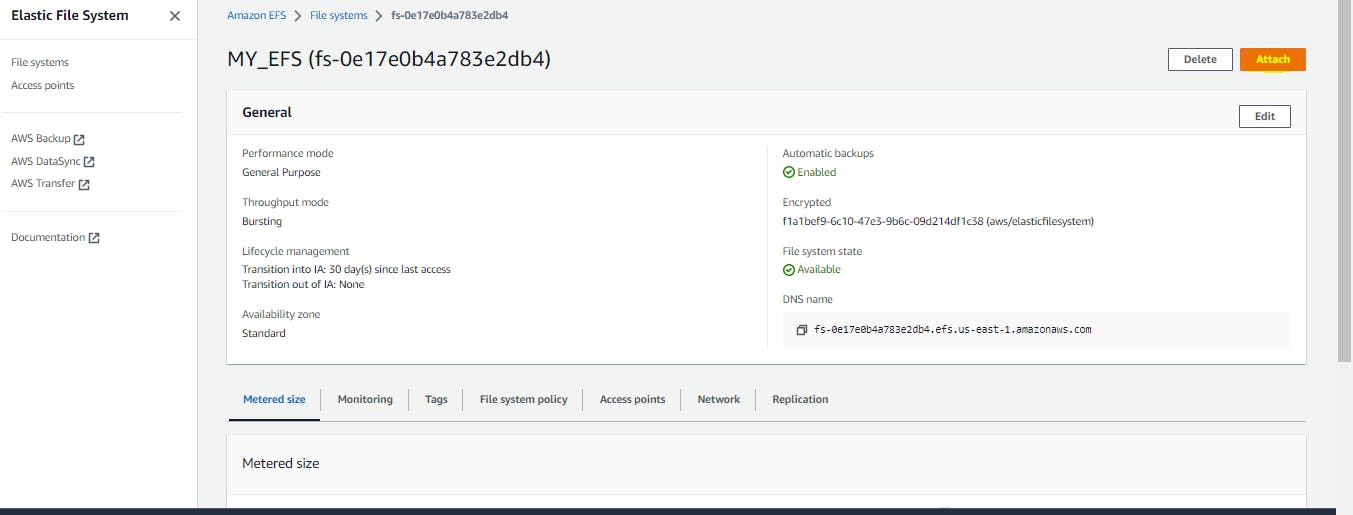
- Click on create EFS and give name for EFS and select the vpc that you are using.
- Select standard for storage class as we will run instances in different AZs.
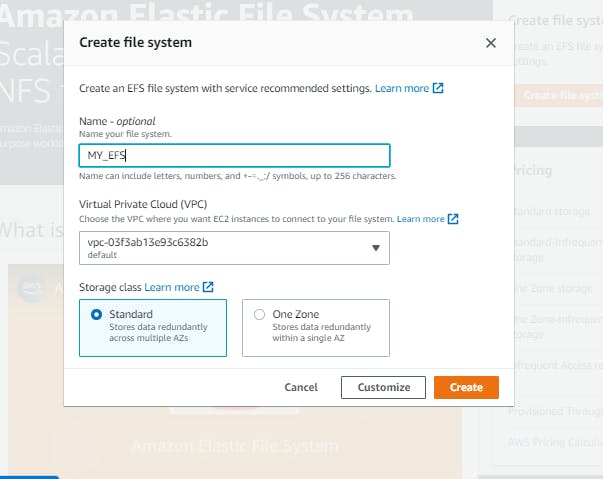
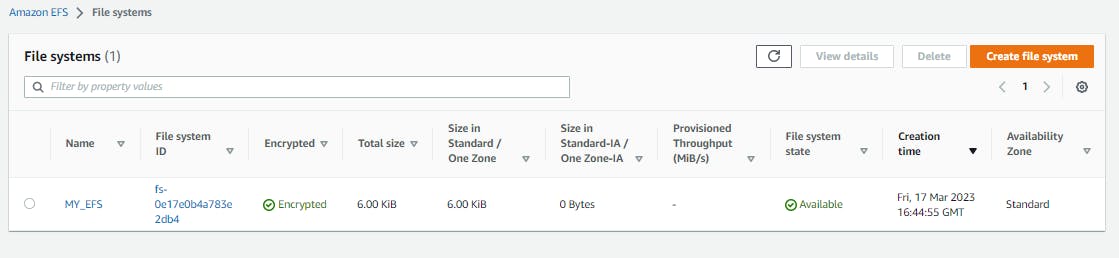
- Click on create and EFS will be created
5. Open Gitbash in the path where your key-pair is downloaded.
6. Connect to the EC2 with that key-pair and public IP of EC2 using the following steps:
- Open the EC2 service in AWS console and click on instances as shown below:

- Click on the instance that you created and copy the public IP of EC2 as shown below:
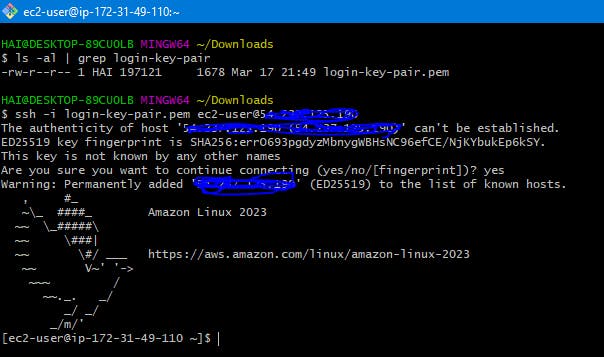
- Connect to EC2 with the following command in your git bash:
$ ls -al | grep login-key-pair
$ ssh -i login-key-pair.pem ec2-user@54.237.125.190
then type yes and hit enter, You will be logged into the ec2 as shown below:
7. Lets mount the EFS and Install Jenkins:
- Update the packages by running the following cmds:
$ sudo -i
$ yum update -y
- Mount EFS to the path /usr/lib/jenkins (As it is the default Jenkins homepage) by running the following cmds:
- create a directory by running below cmd:
$ mkdir /var/lib/jenkins
- Go to EFS page and click on EFS which you have created. Click on Attach as shown below:
- Copy the command in the page as shown in below and edit the path efs to /var/lib/jenkins as shown below:

$ sudo mount -t nfs4 -o nfsvers=4.1,rsize=1048576,wsize=1048576,hard,timeo=600,retrans=2,noresvport fs-0e17e0b4a783e2db4.efs.us-east-1.amazonaws.com:/ /var/lib/jenkins
- You can check by using the cmd 'df -h' as shown below:

- Install the jenkins by running following cmds:
$ sudo wget -O /etc/yum.repos.d/jenkins.repo https://pkg.jenkins.io/redhat-stable/jenkins.repo
$ sudo rpm --import https://pkg.jenkins.io/redhat-stable/jenkins.io.key
$ sudo yum upgrade
$ sudo yum install java-11-amazon-corretto-headless -y
$ sudo yum install jenkins -y
$ sudo systemctl daemon-reload
$ sudo systemctl start jenkins
- Now you can check the status of jenkins as shown below:
$ sudo systemctl status jenkins
- Open jenkins page by http://PUBLIC_IP:8080/
- setup the jenkins with one admin account and install all the plugins by following the jenkins dashboard.
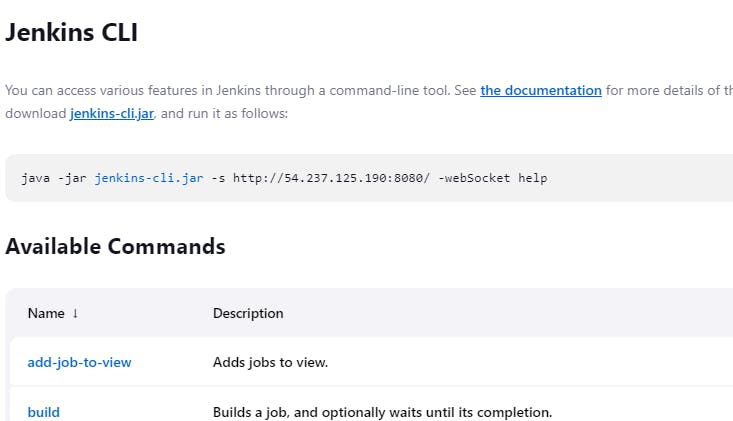
- Now Jenkins is up. Login into Jenkins and download the cli to EC2 instance by following the steps:
- Go to Manage Jenkins > click on Jenkins CLI > Copy the jenkinscli link address
- make a directory as 'jenkins_sync' in root path and download jenkinscli by following cmd:
$ mkdir /root/jenkins_sync
$ cd /jenkins_sync
$ curl -O http://localhost:8080/jnlpJars/jenkins-cli.jar
$ touch reload.sh
$ echo '#!/bin/bash' > reload.sh
$ echo 'java -jar /root/jenkins_sync/jenkins-cli.jar -s http://localhost:8080/ -auth ADMIN:admin reload-configuration' >> reload.sh
- Replace the ADMIN:admin with the your jenkins user and password.
- Change the permissions of reload.sh file
$ chmod 744 reload.sh
- Lets run this reload.sh file every minute to be in sync with cronjob in all jenkins instances after configuring with Autoscaling group.
- Add the following line in the /etc/crontab file.
* root /root/jenkins_sync/reload.sh
- execute the following cmds:
$ yum install cronie -y
$ systemctl start crond
$ systemctl enable crond
- Now, we are good with Jenkins installation. Lets remove the efs and create AMI.
- Run the below cmds:
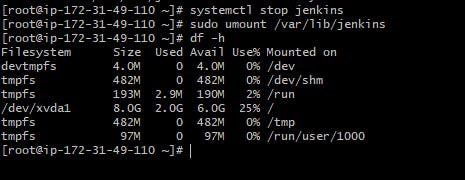
$ sudo systemctl stop jenkins
$ sudo umount /var/lib/jenkins
$ df -h
8. Lets create an AMI, Go to EC2 console and click on your EC2 instance. Click on " Actions > image and template > create image " as shown below:
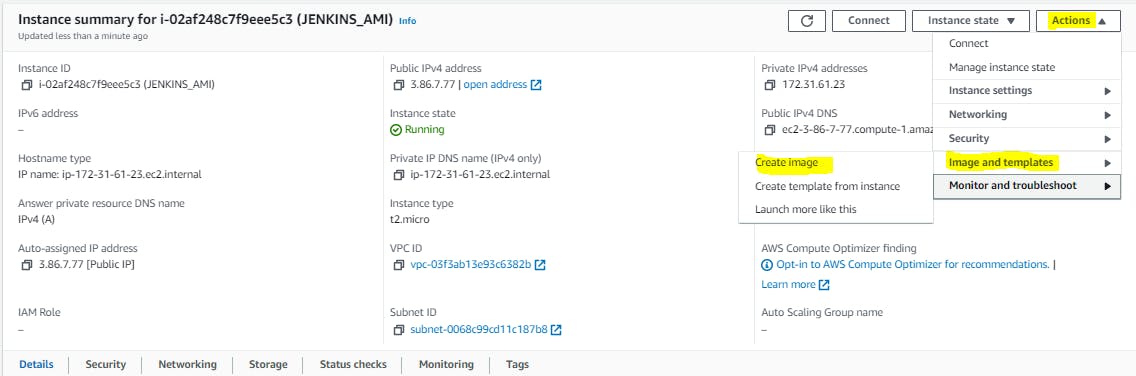
- Give name and description, leave remaining values as it is and click on create image.
- Click on AMI's and you can see the status of AMI as shown below:
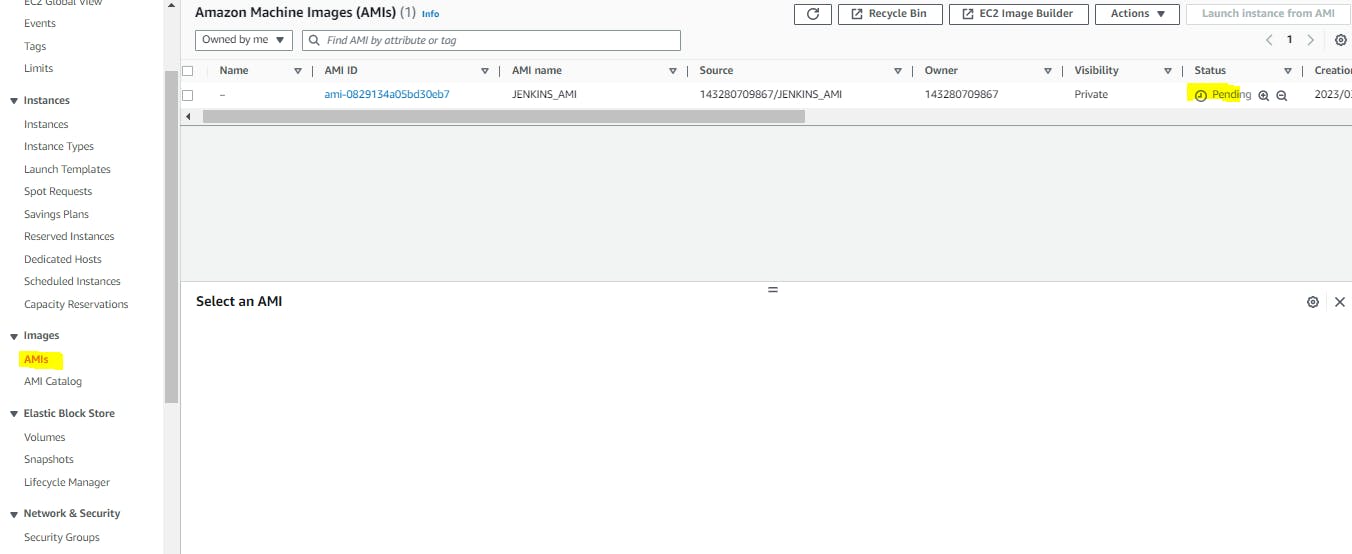
- Terminate your EC2 once the AMI image is available.
2. Creating the Jenkins servers Launch Configuration:
1. Once your AMI is created, we will use it to configure the Autoscaling group.
2. Go to EC2 console and click on Launch configuration as shown below:
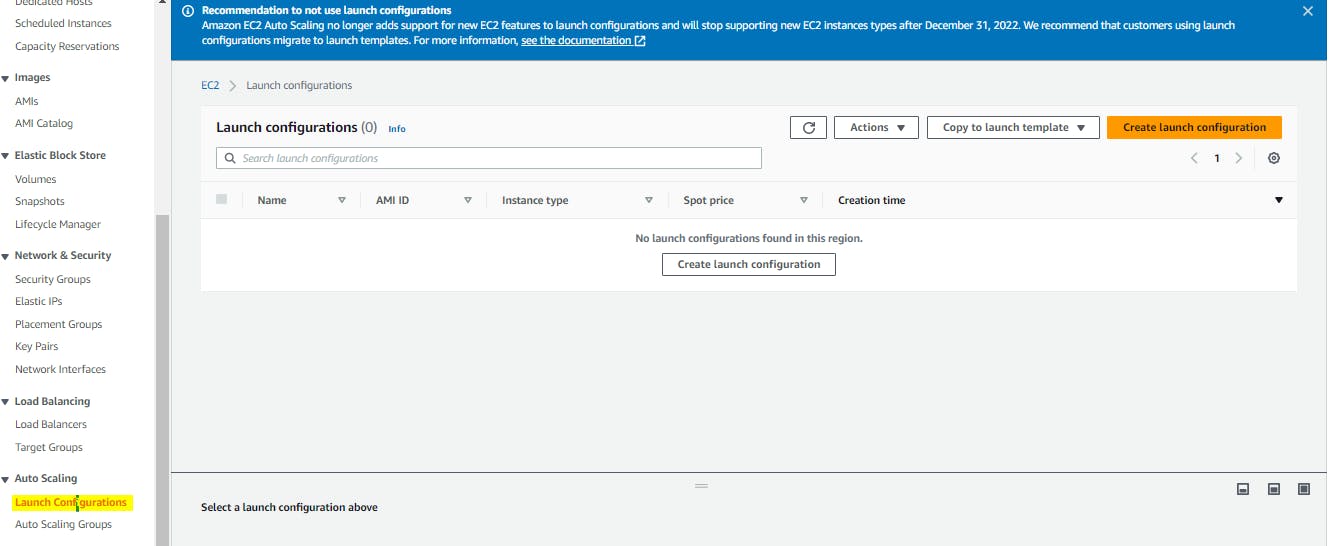
3. Click on Create Launch configuration and select the AMI image (created image), security groups and key-pair login.
4. Click on advance settings and give the below cmds in user data as shown below:
#!/bin/bash
sudo systemctl stop jenkins
rm -rf /var/lib/jenkins
mkdir /var/lib/jenkins
sudo mount -t nfs4 -o nfsvers=4.1,rsize=1048576,wsize=1048576,hard,timeo=600,retrans=2,noresvport fs-01d6e34d4fcfa691a.efs.us-east-1.amazonaws.com:/ /var/lib/jenkins
sudo systemctl start jenkins
sudo systemctl enable jenkins

5. click on Launch configuration. Now we are ready with Launch configuration.
3. Create an Auto-Scaling Group :
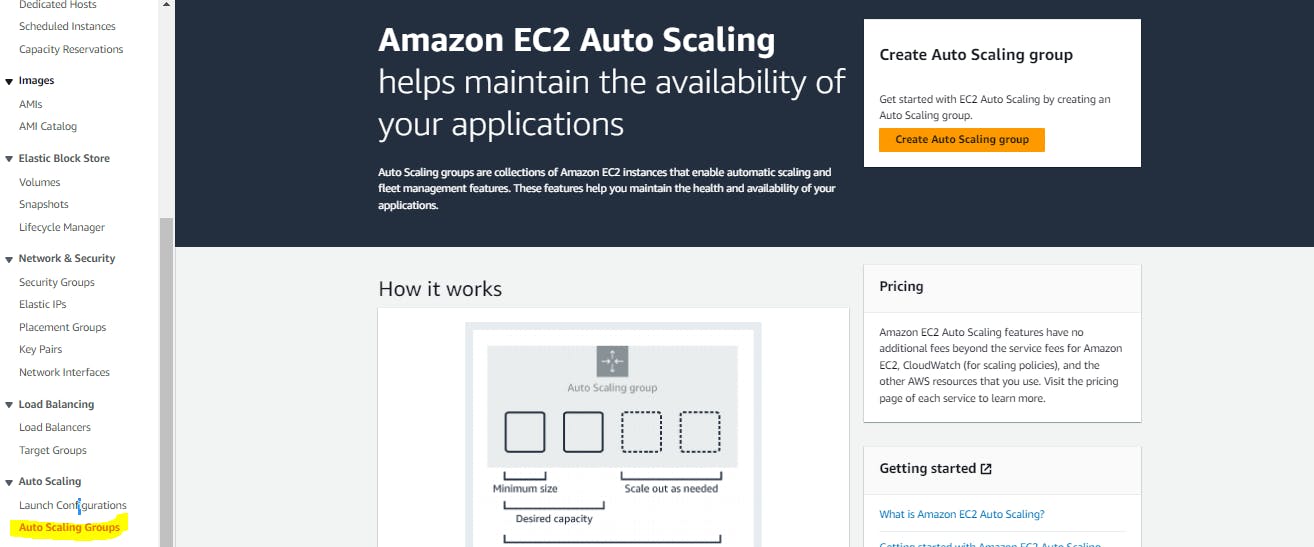
1. Go to EC2 console, and click Autoscaling group as shown below:
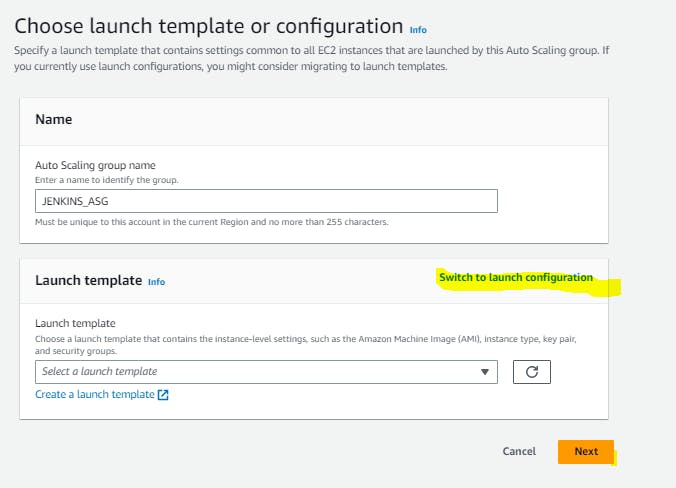
2. Give name for ASG and Click on switch to Launch configuration and select the previous configured launch configuration as shown below:
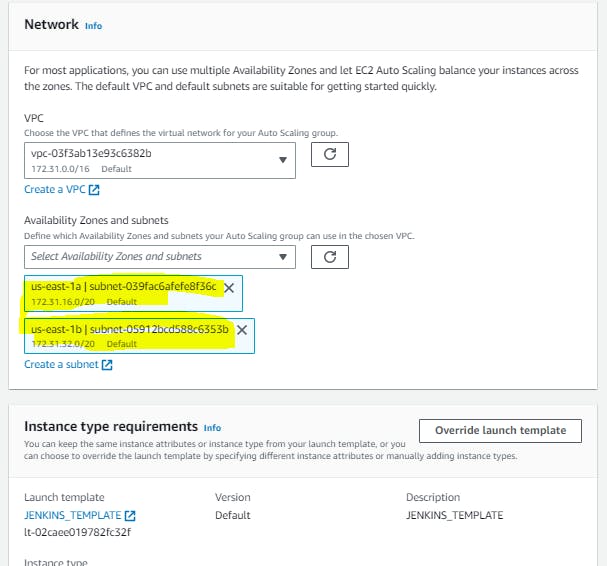
3. Select the VPC and Subnet regions on which you need to run these jenkins servers. I have selected two regions as shown below:
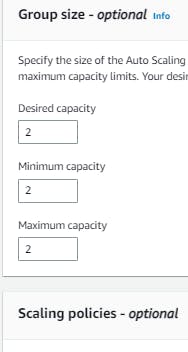
4. Give instances group size as shown below:
5. Leaving all the options as default, Click Next continously and Launch ASG.
6. It will take time to launch jenkins servers. Go to EC2 console and wait for instances.
Lets Open both server jenkins with their public IP:
1. Go to EC2 console, you will find your EC2 instances there and copy the public ip and open jenkins using http://PUBLIC_IP:8080/
2. create a job and run in first jenkins as shown below:
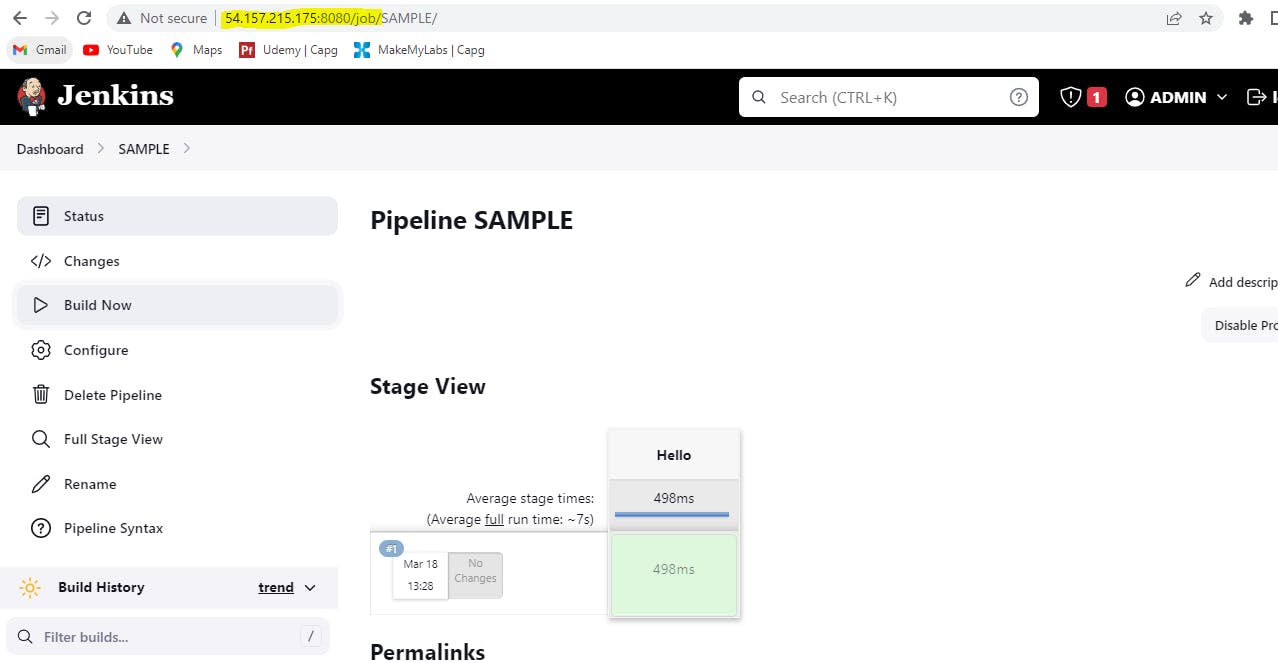
3. You will be able to see the same job in the second server also as shown below:
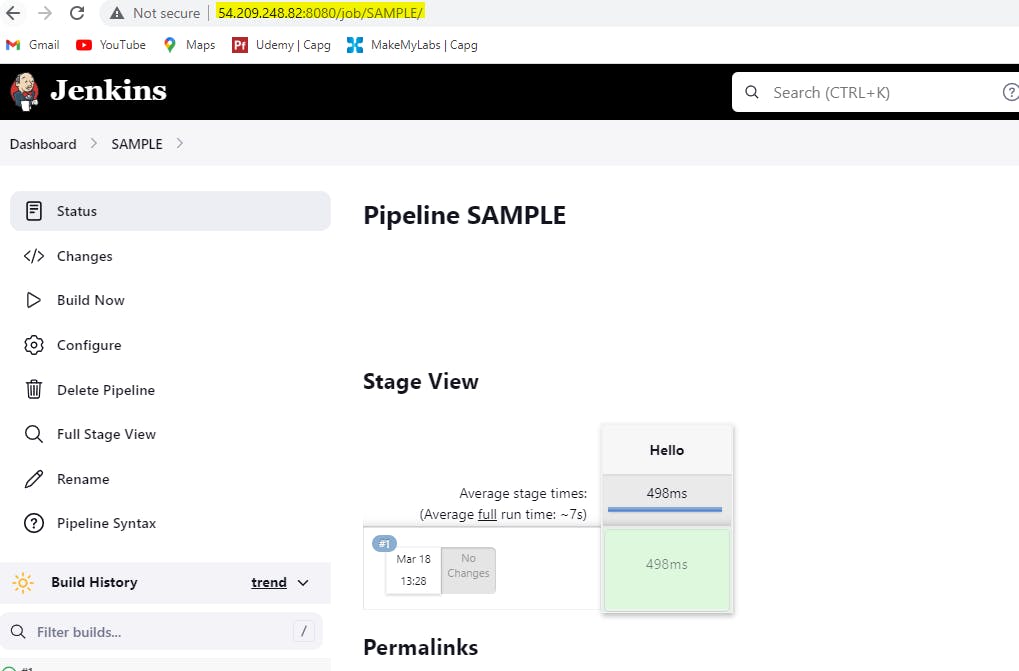
4. This sync will be done by the cronjob that we have configured previously.
Attach a LoadBalancer:
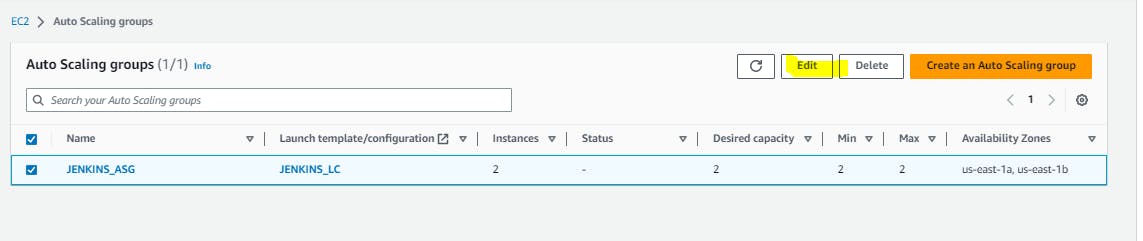
1. Go to EC2 console and click on the Autoscaling group.
2. Select the Autoscaling group and click on edit as shown below:
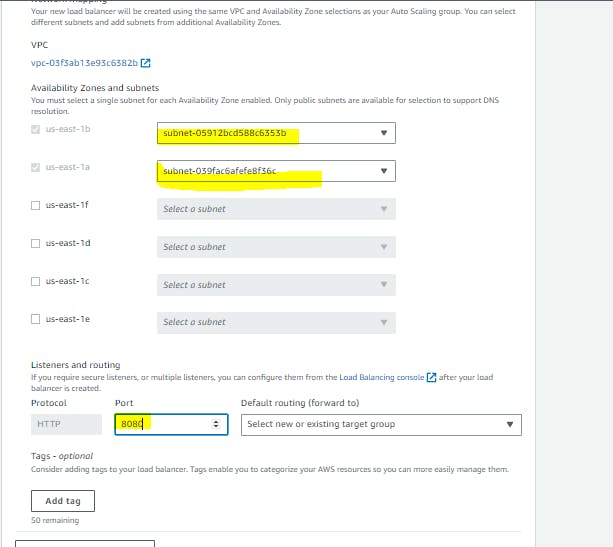
3. Go to Load balancer options. Click on Add new load balancer.
4. Give loadbalancer name, select internet-facing, select VPC, subnets, port as 8080 as shown below:
5. Click on default routing drop down and click on create a new target group. Give a name to target group and Click on Update.
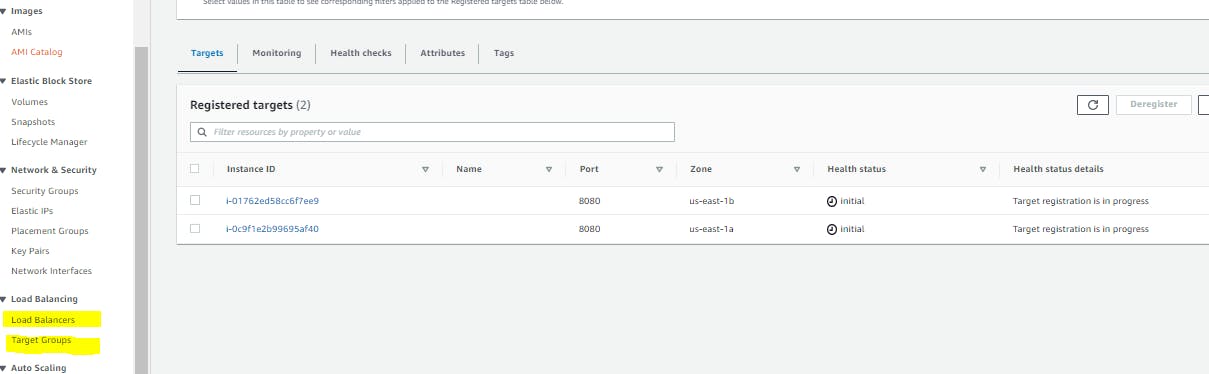
6. Wait for some time and Check the load balancer status and Target groups by clicking on the tabs as shown below:
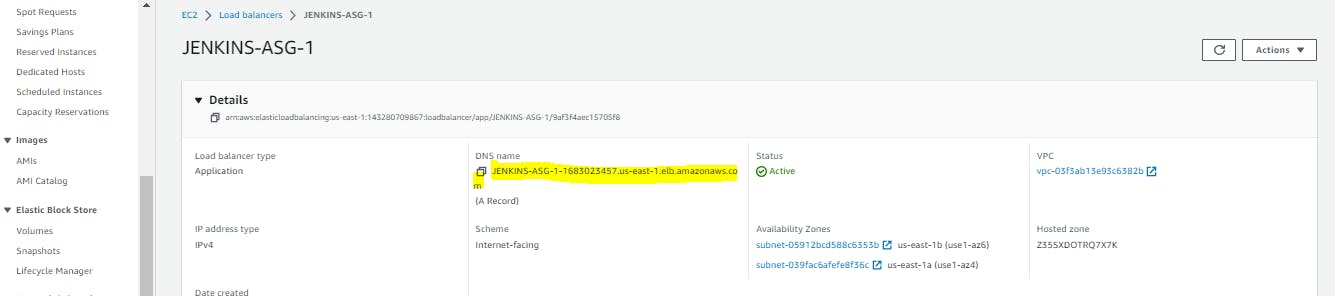
7. Once they are ready, Go to load balancer and copy the url as shown below:
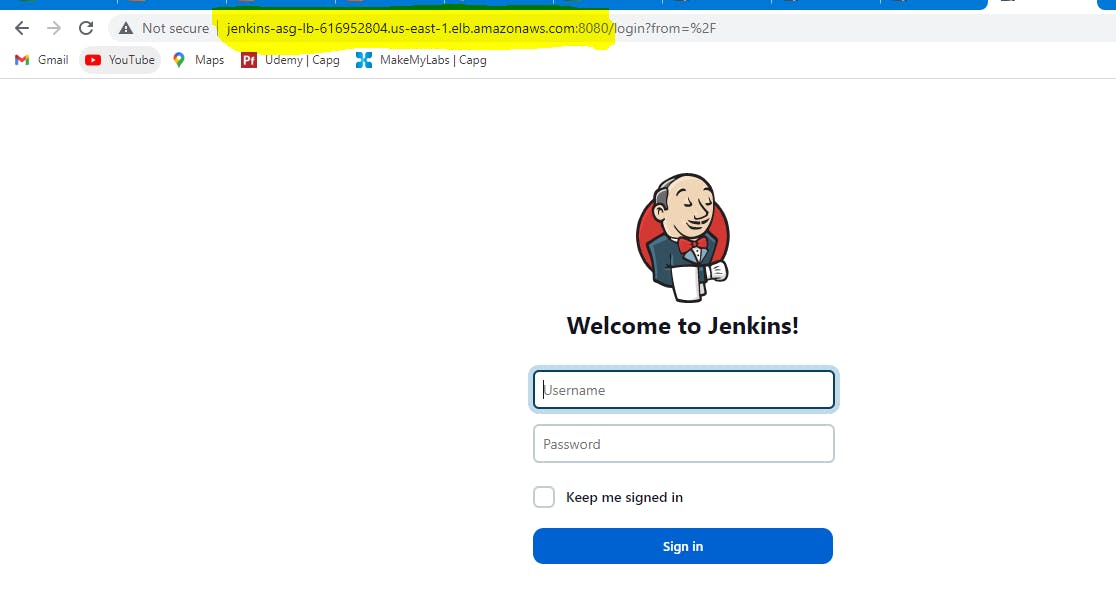
8. Open in a new tab as http://LOAD_BALANCER_URL:8080/, You will be at jenkins login page as shown below:
Finally, we have launched our jenkins with autoscaling group. If one of the jenkins server is down, ELB will serve the requests from other available jenkins server. All the jobs run/configuration changes in one server will be synced with other services with the cronjob that we have configured.
DELETE ALL RESOURCES CREATED IN AWS:
Make all the below resouces are deleted.
Delete ASG group will delete EC2 instances also.
Delete Load balancer.
Delete Target groups.
Delete EFS
Delete AMI
Delete EBS snapshot
Delete security groups
Delete key-pair login